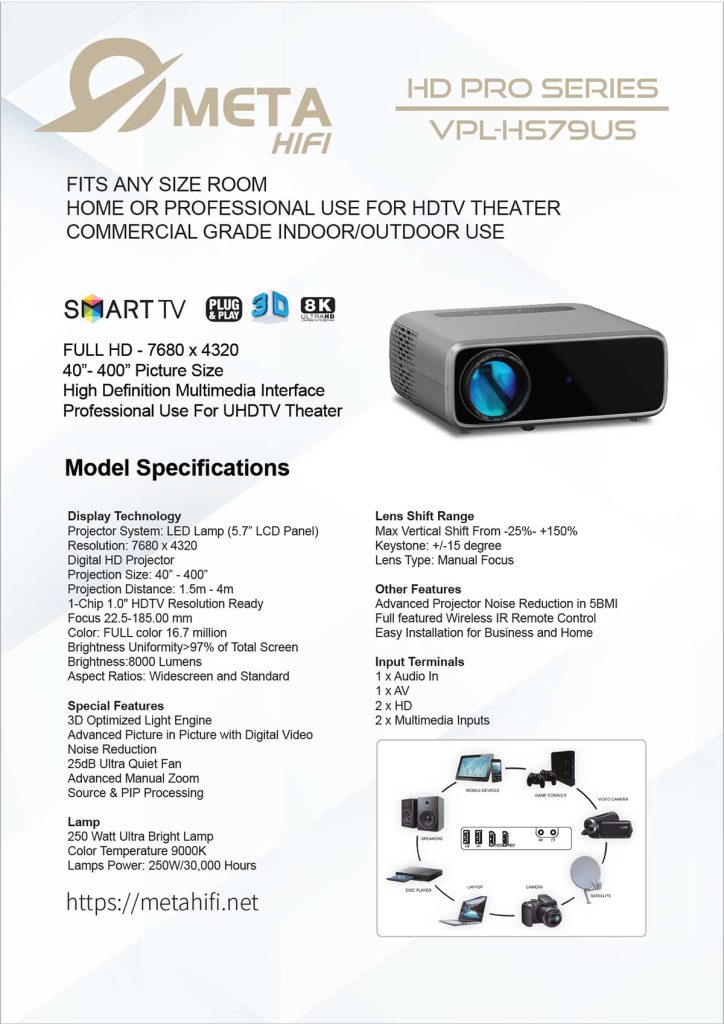
Meta HiFi VPL-HS79US Projector

A projector upgrade rarely fails because the projector is “bad.” It fails because the setup was treated like a one-evening task: put it on a shelf, point it at a wall, and hope the image lands where it should. The result is usually a bright picture with small annoyances—keystone artifacts, fan noise that becomes noticeable, and a screen size that never feels quite right.
I prefer to treat a projector like a compact project with clear acceptance criteria: image size, placement constraints, lighting conditions, and a workflow that stays stable after day one. The Meta HiFi VPL-HS79US positions itself as an HD Pro Series unit for home or professional UHDTV theater, with a 40”–400” picture range, 1.5m–4m projection distance, and a brightness rating of 8000 lumens. Meta HiFi VPL-HS79US Projector
Those numbers are useful—if you turn them into decisions.
Development
1) Start with scope: what experience are you building?
Before you think about resolution, define what the projector must do well in your space:
- Movie-first setup: cinematic size, controlled light, quiet operation
- Mixed use: films + sports + casual TV, with fast start/stop and minimal adjustment
- Occasional “event mode”: big image for gatherings, maybe even outdoors
The spec sheet explicitly frames this model as “fits any size room” and “commercial grade indoor/outdoor use.” Meta HiFi VPL-HS79US Projector
That breadth is fine, but it works best when you pick a primary mode. Otherwise, you’ll keep re-tuning the same settings.
2) Translate specs into constraints you can actually manage
Specs become helpful when they remove ambiguity.
Image size and distance are your first constraints. The VPL-HS79US lists 40”–400” and 1.5m–4m. Meta HiFi VPL-HS79US Projector
That doesn’t automatically tell you the “perfect” screen size, but it does tell you what’s realistic in your room. Measure your available throw distance and decide your target image size before mounting anything.
Brightness matters next. The unit is rated at 8000 lumens, with >97% brightness uniformity across the screen. Meta HiFi VPL-HS79US Projector
In practice, this means you can aim for a large image without the center looking noticeably brighter than the edges—especially useful when you’re pushing beyond “TV-sized” diagonals.
Noise is the silent deal-breaker. The brochure calls out a 25dB ultra-quiet fan and additional noise reduction features. Meta HiFi VPL-HS79US Projector
Even if you don’t obsess over decibels, that line tells you the designers expect this projector to run in the same room where people are listening to dialogue.
3) Plan alignment properly, so you don’t overuse keystone
Most “projector setups” end up depending on keystone correction to compensate for placement. It works—but it’s a workaround. And you usually pay for it in image geometry or edge sharpness.
This model includes lens shift with a stated vertical range from -25% to +150%, plus keystone ±15°. Meta HiFi VPL-HS79US Projector
My approach is simple:
- Use lens shift as the primary tool for alignment (it’s the cleaner correction).
- Keep keystone for small fixes, not for rescuing a poor mount position.
It’s the difference between a stable installation and one you constantly “re-fix” after small bumps or cable changes.
4) Commissioning: do it in two passes, not one long night
If you want a setup that stays predictable, split the work. It’s faster overall.
Pass 1 (30–45 minutes): placement and geometry
- Place the projector at your measured distance (start near the middle of your possible range).
- Get the screen framing correct using lens shift first, then minimal keystone if needed.
- Lock in focus with the manual lens (the sheet lists a manual focus lens and an advanced manual zoom). Meta HiFi VPL-HS79US Projector
Pass 2 (20–30 minutes): image behavior and comfort
- Check brightness in your typical lighting.
- Verify aspect ratio behavior (it supports widescreen and standard). Meta HiFi VPL-HS79US Projector
- Test a quiet dialogue scene to see if fan noise is noticeable from your seating position.
I often put this on the calendar as a short time block. Not because it’s hard, but because it prevents the setup from dragging into a week of “I’ll tweak it later.”
5) Make inputs and switching boring—in a good way
A projector can be technically strong and still feel annoying if switching sources is clumsy. The VPL-HS79US lists inputs including 2× HD, 2× multimedia inputs, 1× AV, and 1× audio in, plus a wireless IR remote. Meta HiFi VPL-HS79US Projector
Here’s a practical integration workflow that keeps things stable:
- Primary path: your main video source → projector (the path you use 90% of the time)
- Secondary path: occasional device (laptop, camera, streaming stick) → projector
- Audio plan: decide early whether audio goes through the projector’s audio-in routing or to a separate sound system
If you design the “daily path” intentionally, everything else becomes optional instead of disruptive.
6) Use the “extras” only if they support your real use case
This projector lists features like 3D optimized light engine, picture-in-picture, and noise reduction, plus an “easy installation for business and home” positioning. Meta HiFi VPL-HS79US Projector
These can be genuinely useful—especially PIP for presentations or monitoring multiple sources—but only if they fit your day-to-day.
My rule: don’t turn on everything because it exists. Turn on what supports your actual workflow. Leave the rest alone.
7) Keep a lightweight review so quality doesn’t drift
Projector setups degrade slowly: a bumped stand, a reset setting, a new device that changes output. You don’t need constant tinkering, but a simple routine helps.
Once a week, I do a 3-minute weekly review:
- check framing (did the image shift?)
- check focus (still sharp at the corners?)
- check source behavior (does your main device still output correctly?)
Small effort. Stable results.
Conclusion
The Meta HiFi VPL-HS79US is presented as a high-output projector built for both home and professional environments, with a 40”–400” projection range, 1.5m–4m throw distance, 8000 lumens brightness, 25dB fan noise claim, and alignment tools like lens shift and ±15° keystone—plus a straightforward set of inputs for common sources. Meta HiFi VPL-HS79US Projector
If you treat it like a compact project—scope first, placement second, integration third—you’ll get a setup that feels calm and reliable. The image becomes the default, not a recurring adjustment task. And that’s the point: the best projector setup is the one you stop thinking about.